The final actions at the completion of the repair is the finishing of the premises. She crowns the long, intense efforts to create the desired atmosphere and planned decor. If the owner of the home or office made repairs on his own, then he can cope with the creation of Venetian plaster. This is a rather lengthy and complex process, requiring special skills, but if desired, such a goal is achievable.
The invention of Venetian plaster
It may seem strange, but this kind of stucco first appeared not in Venice, but in Ancient Rome. And only a century later, it again revived with some minor features in Venice and from then on it began to be called “stucco veneziano”.
The initial reasons for its appearance are quite trivial and simple. Marble in Rome was a common and affordable building material, the processing of which left a large number of various wastes - damaged blocks or slabs, dust, crumbs.
Once, some frugal master came up with the idea to use this garbage to good use. He collected dust, small marble chips and made materials for finishing buildings from simple stone. As a result, ordinary walls were almost impossible to distinguish from those built from real marble. In addition, the use of such technology greatly simplifies the construction and eliminates the time-consuming process of processing marble blocks.
When the re-opening by local craftsmen in Venice took place, the composition for decorative decoration got its final name - stucco. Many artists of that (Middle Ages) time (Rosselli, Raphael, Van Eyck, Michelangelo, etc.) often used walls to show their talent, and it was especially convenient to do this on marble plaster.
Composition of Venetian Plaster
After going through many centuries, the component composition of the material has remained virtually unchanged. Knowledge of how to make Venetian plaster is relevant and useful in modern construction. Naturally, progress has made certain changes in the form of polymer or synthetic additives, chemical dyes, but the basic composition has remained in its original form.
The most important thing is dust, mainly marble with the addition of quartz, granite and other types of stone. It is important that the dust grains are as small as possible.
The second most important ingredient is a binder. In the Middle Ages, slaked lime played this role. Other components were dyes and water, respectively. As dyes, masters used animal blood, bile, plant juices, etc.
The elements were carefully weighed, and they were mixed to a creamy consistency - then the plaster was considered completely ready. Given the not very complex composition, Venetian plaster can be made with your own hands.
The modern composition, of course, has a difference in the components used:
- instead of lime, synthetic binders, acrylic or other similar materials are used,
- artificial compounds took the place of mineral dyes.
However, according to most experts, only the classic recipe is able to fully demonstrate the full brilliance and play of light marble. Therefore, if there is a desire to make Venetian plaster, it is recommended to focus on natural (natural) components. Of course, you don’t need to look for blood, you can take a modern dye, but marble dust and hydrated lime can be obtained without much difficulty.
Venetian Plaster Properties
In order to qualitatively make such a decoration of a room, with one's own hand, it is necessary to know all the information about this composition, especially its properties. This will make it possible to most effectively use the potential of such an amazing building material.
The plaster itself is transparent, which makes it possible to achieve an indescribable light play, so the surface preparation must be done carefully and very high quality. Otherwise, every unevenness or crack on the surface to be trimmed will be noticeable.
You can apply Venetian plaster without fear on wood, brick or concrete. As already noted, the main thing is the meticulous preparation of the place for future application of the composition. As for the color range, there can be any gamut. Very popular is the imitation of the surface of the processed stone, for example, marble. The pigment of the selected color should be added to the composition immediately before use.
Upon completion of the finishing work, an excellent coating is obtained with properties such as vapor permeability, hardness and moisture resistance. The average lifespan of Venetian plaster is approximately 13–16 years.
After the plaster is applied to the wall, it actively begins to absorb carbon monoxide from the surrounding air and carbonization processes begin in it. The result is a solid carbon film that provides exceptional performance.
Mineral or synthetic materials differ slightly in characteristics, but this does not fundamentally change the properties. The textured structure of the coating can be matched to almost any layout, interior and furniture.
Which option to choose should be decided by the owner of the premises. Properly thought-out finish is able to create a unique pattern necessary for the implementation of the overall plan. The most significant drawbacks can be considered a complex, time-consuming process of applying the material and its high price. If in the end the Venetian stucco is chosen, then its own preparation will significantly reduce the total costs. Nevertheless, the result obtained will fully compensate all the efforts expended.
We carry out application work
First, it should be noted that the main difficulty in the formation of such a decorative coating lies in the features of the technology of its application. This is a long, time-consuming and complex process, but it is the determining final result. Consider the main subtleties and nuances:
1. Equipment used and materials used. To get a good desired result, you need a certain set of tools:
- spatulas and scoop,
- ironer and rule
- construction mixer or nozzle type "mixer" for a drill,
- containers for mixtures and water,
- wax polishing machine (special nozzle).
Depending on the situation, some special devices may be required (for example, an hatchet, an angular equalizer, a grater, etc.), but this happens mainly when plastering a complex wall topography.
3. Cooking the mixture. At this stage, you can choose one, the most suitable path, out of three possible:
- the simplest is to take the ready-made (prepared at the factory) mixture and get the right plaster by adding the right dye,
- to purchase, ready to use, dry mix, which you must dilute yourself with water. Following the instructions, pour the required amount of water into the prepared container. Then you need to add the dry mixture and mix thoroughly to a creamy consistency with a mixer (or a drill with a special nozzle).
Recommendation! In order for the components to dissolve better and faster, the water temperature must be above 11 ° C!
After ten minutes, the mixing process must be repeated,
- you can make the mixture with your own hands, having studied in detail the plaster recipe. It is necessary to mix marble dust (malachite, quartz or other stone), Ca (OH) 2 (calcium hydroxide or hydrated lime) and dye in the right proportions.
It is possible that in the process of preparation an innovative recipe will be obtained, and the repairman will become the creator of the technology for obtaining new material for decorative decoration. No matter which path is chosen, the main difficulty lies in the difficulty of applying the prepared mixture.
Venetian application technology
The basic principle is the application of several of the thinnest layers of decorative coating. They should consist of randomly spaced material spots of different sizes and configurations.
The application process has an important feature - intermittent layer thickness should be formed over the surface area. This technique helps to achieve smooth transitions of shades and tones, that is, perform color stretching. The visual depth of the natural material and the illusion of the pattern are created with a harmonious combination of multilayer spots.
The preparatory (first) layer should be made exclusively of material containing marble "flour" to ensure reliable and high-quality adhesion to the wall surface. It is applied with a metal trowel or putty knife, similar to putty.
When the layer dries, proceed to the application of coating, glaze layers, creating a patterned texture. If the design of the finish coating is planned to create a matte, then the glaze layer is continued. And when there is a desire to get a glossy surface, then use a special layer mixed with the coating chosen by tone.
If you are unsatisfied with the glossy result, you should not allow the coating to dry, after which you should immediately start applying the next layer with randomly distributed spots and repeat the entire cycle completely in limited areas (no more than 1 sq. M).
In case of accidental damage to the surface of the final coating, you can gently, using a narrow spatula, apply a small amount of material to the defective place and allow it to dry. After some time, it is necessary to sand the restored area with sandpaper and finish it with the final material.
If necessary, a series of additional layers, including those having different colors, can be applied to the final glossy wall surface.
Important to remember! It is necessary to apply the coating with convenient, small areas (not more than 1 sq. M), performing the following procedures in strict sequence:
1. Arbitrary strokes of the material. If provided in advance, then in different colors.
2. Their simplified leveling.
3. Carrying out within the site of loose smoothing.
4. Glossy, polished surface.
During the application of the material with strokes, you need to press the spatula (ironer) at the very beginning, and at the end of the movement, loosen it. This will allow you to smoothly change the thickness of the layers. Upon completion of work on one site, repeat the entire cycle on the next, and so on until the very end.
When glossing and smoothing, movements should cross the edges of adjacent sections. You can touch the surface after 5-6 hours, but indoor work will have to be stopped for a day. The walls will completely dry in 6-8 days.
Recommendations of specialists
1. You should always monitor the cleanliness of tools, especially in the process. At the end of the day, they should be soaked overnight in a bucket of clean water.
2. You can easily control the texture of the coating, change the length of the strokes, the size of the patterns and the force of pressure. The unsystematic gaps between decorating contours and patterns look spectacular.
3. Care must be taken at all stages to protect the material from debris and dust. It should be borne in mind that each polluting particle will noticeably stand out on the finished surface of the wall.
4. No need to be afraid to experiment with the colors of the base layer.
The history of the appearance of Venetian plaster
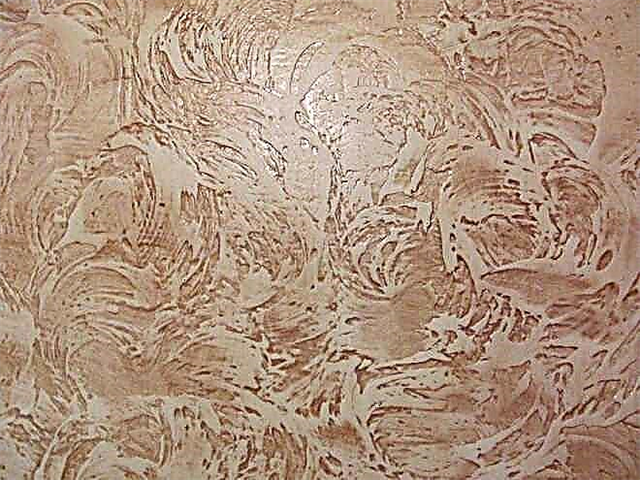
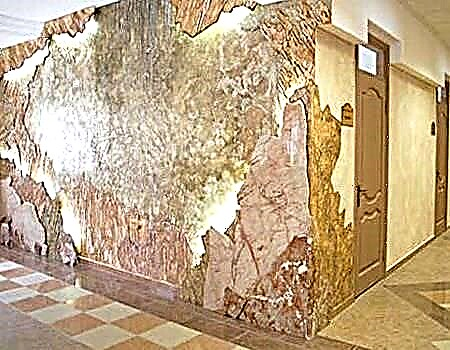
If the wall we are looking at resembles a marble surface where there are no seams, it can be argued that it is decorated with Venetian plaster. The material in question was invented in Ancient Rome. Our ancestors mixed slaked lime with marble dust, resulting in an elastic composition. Placed on the wall, it looked like natural marble. To enhance the effect, various natural dyes were added to the mixture.
The most popular material was ordinary clay. Its use gave the finish a resemblance to natural marble. To make the venetian marble plaster finish durable, a layer of wax was applied on it and polished.
During the Renaissance in Venice, Venetian plaster was used instead of marble slabs. It was applied to walls, columns and ceilings. The material reacted poorly to fluctuations in t0 and humidity, was easy to process, and affordable.
Nowadays, this type of finish has not lost its relevance. The components discussed above are also used today to prepare the mixture. Modern technologies make it possible to introduce other binders into its composition in order to give a decorative plaster a light or saturated color.
Features of Venetian plaster
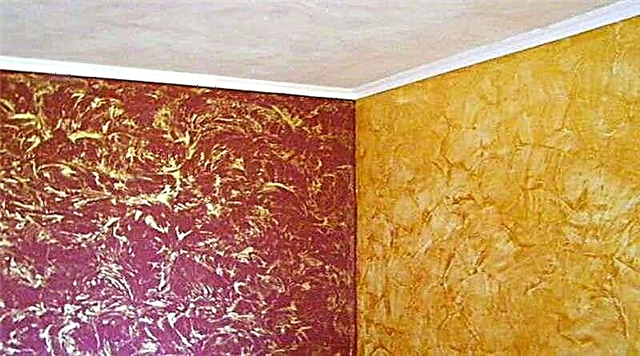
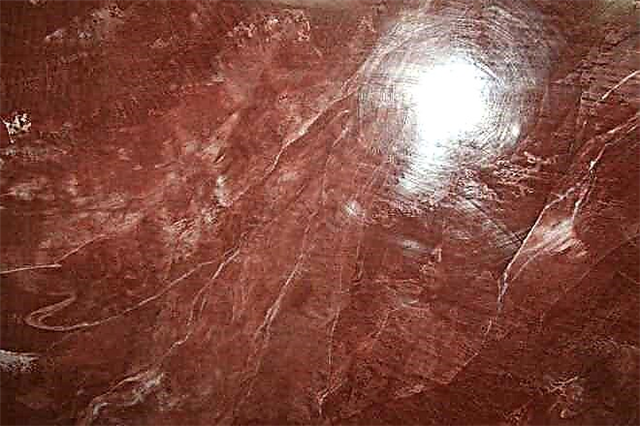
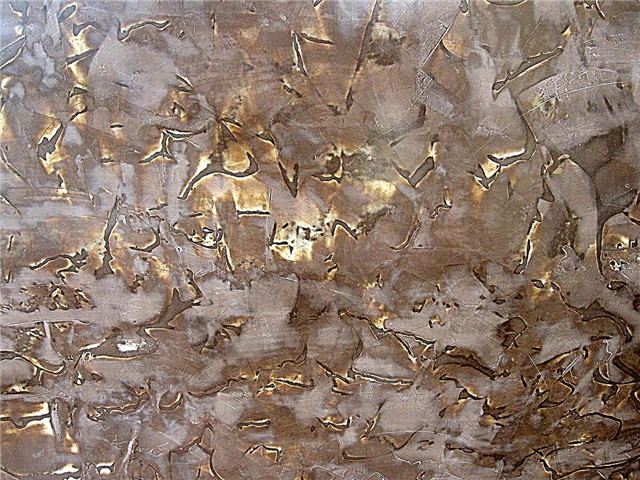
The “Venetian” features include its components and the unusual nature of the resulting picture, which you can read about below. Often found and considered a classic can be called material with a marbled texture - marble Venetian plaster.
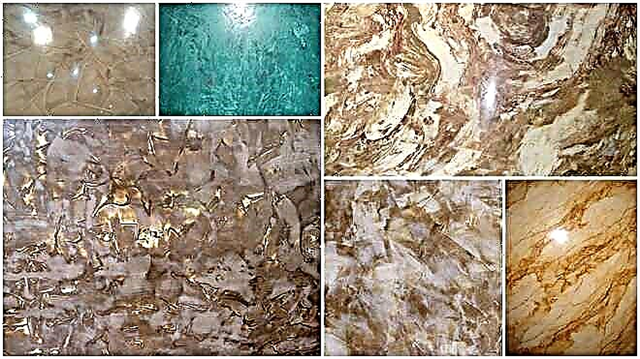
Although, often it can be a silver, gold or mother of pearl finish.
Types of Venetian plaster:
- Veneto is a classic that does not lose its relevance. She imitates polished marble. Stucco is popular because of its appearance and relatively low price.
- "Trevignano" is characterized in that the finished surface has the effect of radiance from the inside. This material has many colors and various shades.
- “Ensausto” outwardly resembles granite in its structure. It is distinguished by a semi-matte color.
The composition of the Venetian plaster intended for internal work is the waste of processed marble, malachite, granite, quartz. The substance of the working mixture is particles of material of different sizes. The smaller they are, the smoother the resulting surface will be.
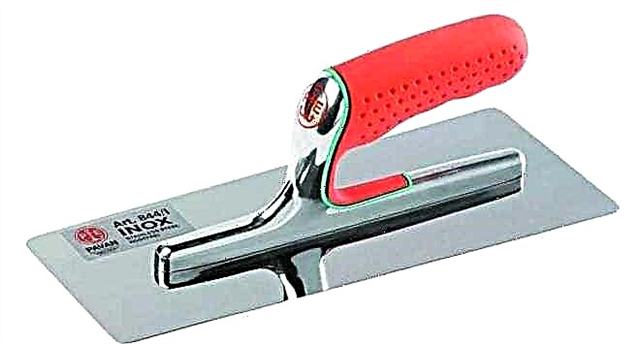
Tools for working with Venetian plaster
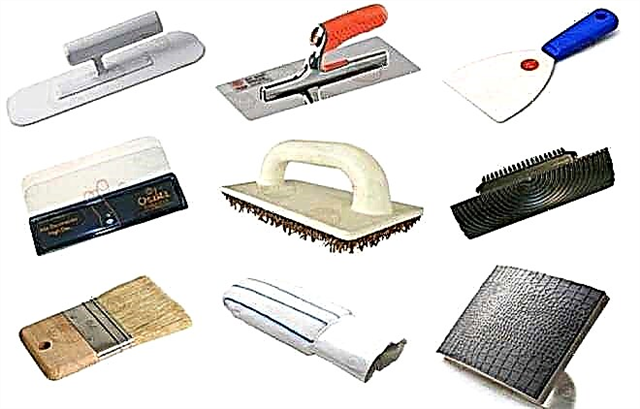
To work with Venetian plaster, you need to prepare:
- Primer, which should contain quartz filler. This is for preparatory work.
- Water.
- Plaster mix.
- Different colors to give specific shades.
- Skin for grouting and grinding with a fine fraction.
- Wax, in the form of a paste, or liquid-shaped to protect marble Venetian plaster and bring the working surface to a gloss.
- For the primer you will need a spatula and a roller.
- To distribute the mixture you need a trowel.
- Rubber spatula for working with wax.
And also, rags for wiping the working tool and containers for mixtures and water.
Venetian plaster: application technology
Having bought the necessary materials and prepared a working tool, you will not be able to plaster the walls without their preparation. This stage is the most important, on which the final result of your work depends on it. Preparation of walls for Venetian plaster includes thorough cleaning of old coatings, dust and dirt. The unevenness of the walls is revealed. If there are cracks, they must be removed using a sand-cement mortar. Then the working surface is degreased and impregnated with a deep penetration primer in order to increase the adhesion of the coating and prevent the development of fungi.
Experts recommend applying a primer in two layers.
How to apply Venetian plaster: a phased process
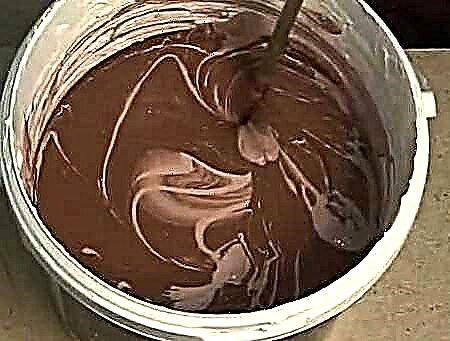
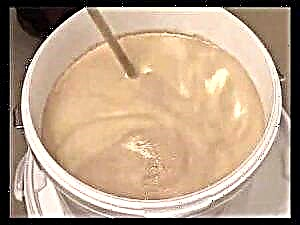
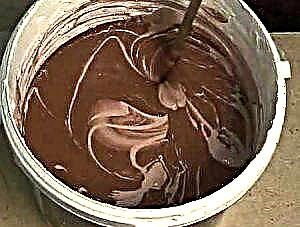
In the distribution network, plaster is offered in buckets and has a pasty consistency.
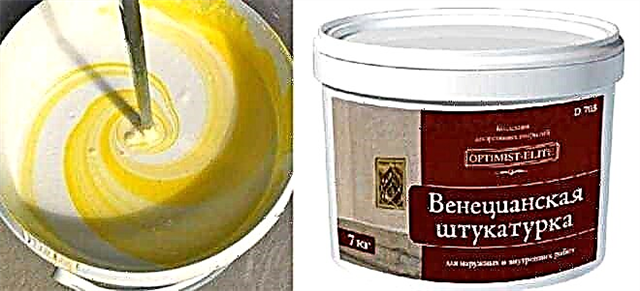
The basic color is white, to which various dyes are added. You can create a color scheme directly in the store or with your own hands at home. As a tool, you need a drill with a nozzle. The mixing process can take from 5 to 10 minutes. It is important to carefully perform the work, pay special attention to the walls of the bucket, where there may be unmixed components. The check is simple: take a bar and draw along the walls. The procedure should be performed several times. The full step of creating a color scheme can take from 10 to 20 minutes. Now you can start painting.
Carefully read the manufacturer's recommendations. A number of them advise to pause 12 hours after work.
It is possible that after drying, the color will change slightly. Check elementary: apply a test smear and let it dry. After that, you can add dye.
When the composition is ready it cannot be exactly repeated - there will be differences. Therefore, there is no point in saving. It is better to prepare the mixture with a margin.
How to apply the layers
Methods of applying Venetian plaster involve the use of two or more layers.
It is important to imagine what you want to get in the end. Layers are applied in different ways. But everyone is necessarily leveled and polished. Do not forget that before laying the next layer, you must let the previous one dry. And only after laying the last layer, you can start processing with beeswax. Synthetic based waxes can be used.
- beeswax gives a gloss
- synthetics - dullness.
Wax is not only gloss, but also protection against moisture. Therefore, Venetian plaster can be applied to the walls in the bathroom. In this case, one nuance should be taken into account: synthetic wax is used for the bathroom.
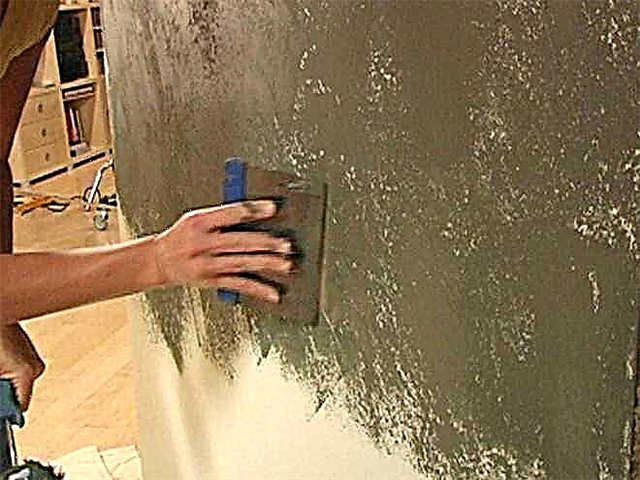
Application of the first base coat
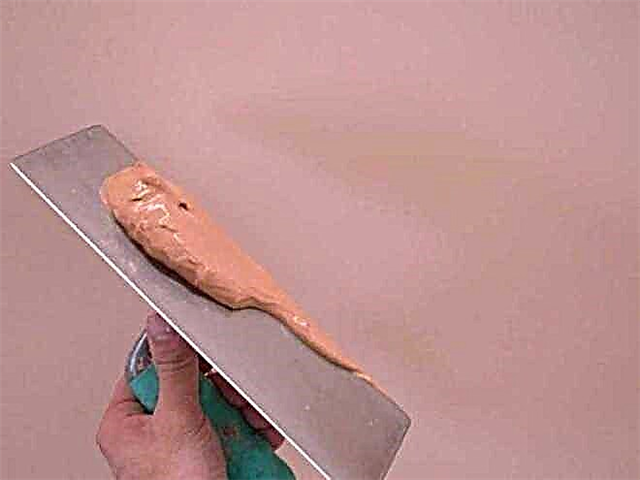
The rules for laying the first layer correspond to the requirements for applying conventional plaster. The main thing is to get a smooth surface. The process involves the use of a working tool - trowels, on which the composition is taken in a small amount, and rubbed against the wall.
Second and subsequent layers
The second and subsequent layers should be applied with random strokes. A flexible, thin metal spatula is used. It is not necessary to maintain uniformity of application. It is from chaotic movements that forms and lines appear on the wall, like on marble. The drying process of each layer takes from one to ten hours. It all depends on the thickness of the layer, the composition of the product, humidity and temperature. Details and recommendations for drying should be on the packaging. When the surface has dried, it is wiped with a trowel. In the process, the differences are smoothed out.
Then, the next layer is applied to the finished surface according to the previously described technology, which is based on the randomness of movements. Again, wait for drying and smooth with a dry trowel. Depth and brightness largely depends on the number of layers.
Finish stage
The final coat should be applied with a thin metal spatula. The layer should be almost transparent. A small amount of the mixture is taken and applied to the surface, tightly pressing the spatula. Then the drying process, which is already familiar to us, will take 20-50 minutes.
Ironing process
It is important not to dry the last layer. It should be slightly damp. We start ironing, processing small sections of the wall (half m2). We applied the mixture and wipe it, performing circular movements with a trowel on which there should be no chips and cracks. You yourself will see how the pattern and characteristic shine appear. Gradually, the "Venetian" will gain depth and layering like marble.
Synthetic wax polishing
The process is similar to working with a natural product. Synthetics are used if you want to get a matte shade with protection. The synthetic product dries from 10 to 14 days and only after this time it can be wiped, washed and so on.
Basic rules for working with Venetian plaster
What is needed for applying venetian plaster? It's simple, you must follow a number of rules. First of all, you need to work slowly, carefully processing each area. Remember that the minimum number of layers applied is three.
The more layers laid, the more spectacular the work will look at the final stage. For example, the best samples made in this technique have 8 layers!
At the final stage, you must definitely perform a wax surface treatment. This will give shine, protect the work for a long time.
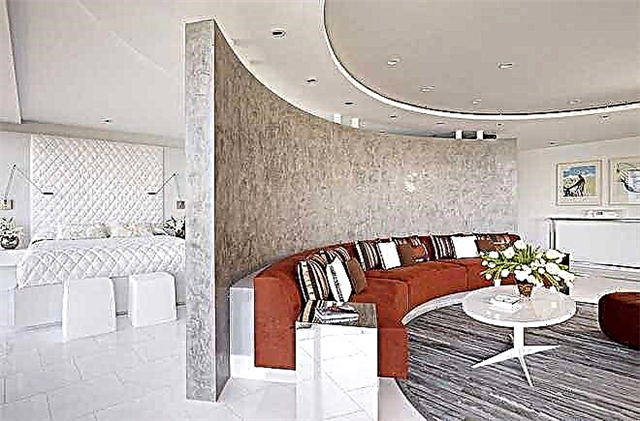
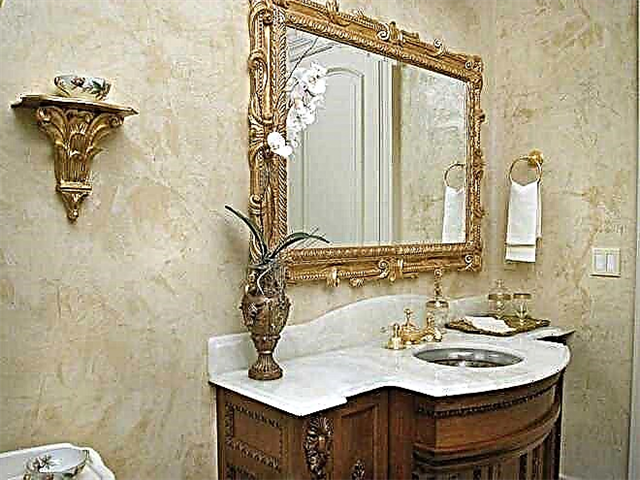
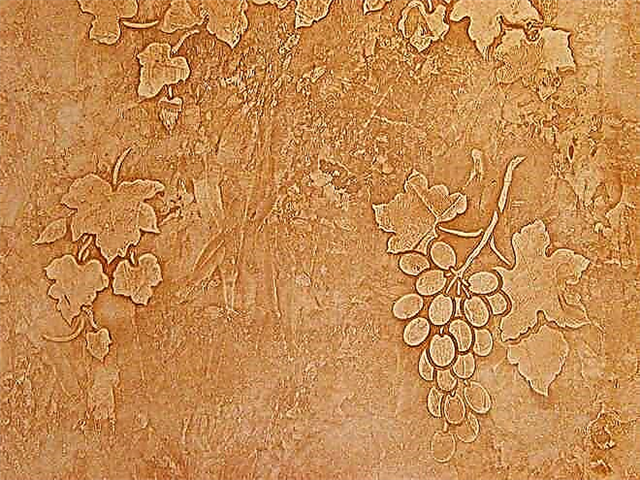
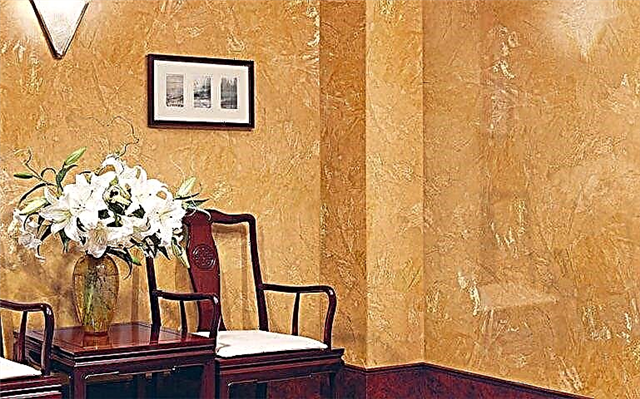
Photos of the best options for Venetian stucco in the interior
Specific examples of Venetian plaster have been prepared especially for you. Watch and choose. Maybe some combination will be of interest.

On the pros and cons
The indisputable advantages of the "Venetian" include:
- Water resistant plaster after waxing.
- No toxicity and complete safety for people, including children.
- In all respects meets the requirements of fire-fighting characteristics.
- In the care of Venetian plaster is not whimsical.
- The operational period is from 5 to 10 years.
Cons are few, but they are:
- High price.
- Long preparatory part.
- The complexity of technology.
Finally
You can do the work yourself. But, given the complexity and high cost of the process, it is recommended to contact specialists.
With a good example, it will be easier for you to understand the technology of applying Venetian plaster and then do the work yourself. Good luck
First, you should study the composition of the Venetian plaster:
Dust- as a rule, from marble with the addition of granite or quartz chips. Moreover, the finer the specks of dust, the better and easier it will be to prepare a composition of Venetian plaster.
Slaked lime - performs the role of a binder. Sometimes, instead of it, acrylic or other synthetic additives may be in the composition of the Venetian plaster.
Dyes- natural components (for example, plant juices) - are now almost completely replaced by various artificial compounds.
WaterFor the preparation of the Venetian, the usual one is used, but it is important to monitor its most optimal temperature. For the manufacture of Venetian stucco with their own hands, it is recommended to use water with a temperature of 11 degrees and above.
How to make a Venetian do it yourself
To prepare Venetian stucco with your own hands, you can use the following methods:
1. Knowing the recipe of the preparation, as well as the proportions of all its components, you need to mix everything until a homogeneous mass is obtained. But this is a rather complicated process, so it’s easier to use the second option.
2. To purchase in the store a ready-made mixture in dry undiluted form. It will need to be diluted with water, following all the instructions on the packaging.
It should be remembered that it is the Venetian mixture that is first poured into the water, and not vice versa.
The resulting solution must be stirred with a drill using a mixer. Water should be at least 11 degrees. Then you need to wait some more time (usually a few minutes are enough) and again mix everything thoroughly. As a result, the mass should resemble “thick sour cream” in appearance. Then you can add dye.
You need to understand that such Venetian plaster, which was bought and can immediately be applied to the walls, is nowhere to be found. This is either a dry mixture that needs to be diluted with liquid, or cooked Venetian plaster from scratch.
Selection, manufacture and application
Venetian plaster - a way of decorative design and imitation of a stone surface (quartz, onyx, lapis lazuli, etc.) or a popular marble of different colors. Its main component is stone chips, which are mixed with acrylic. But you can also make the effect of copper, silver, gold, bronze, imitate leather, wood and fabric (silk, burlap, etc.) using various types of application techniques. It is used, both internal and external element of decor.
 What is Venetian stucco?
It is worth knowing that not only walls, partitions, and ceilings can be decorated with Venetian stucco, giving them a textured look. Plaster flooring is extremely rare. As an element of the interior decor it can be used in the living room, in the kitchen, bathroom and in any other room.
The choice of the future color and texture of the Venetian is the business of the owner of the house. The plaster itself is transparent, which allows it to play beautifully with shine in sunlight, and the dye is added before application. It can be applied both to concrete and brick, and to wood. Only the methods of preparing the surface on which it will be applied differ. It is also possible to apply a picture on the plaster, which will give it a relief look and uniqueness. It can also be matte and glossy. A matte or glossy surface can be obtained by applying various types of wax.
Advantages and disadvantages of the Venetian
- Durable
- Water and moisture resistant
- Easy to care
- Environmentally friendly
- Long service life (at least 20 years)
- Not subject to mold
- Resistant to temperature changes
 The advantages of Venetian plaster
The only drawback is the cost. This is not a budget option. But this can not be attributed to the shortcomings, as the final result is fully justified. Such luxury and sophistication is not achieved by other materials. How to make Venetian stucco with your own hands from ordinary putty will be described below. For the manufacture of Venetian stucco with our own hands, we need:
- very fine fraction stone chips or marble flour (under marble walls)
- slaked lime (putty) or acrylic additives
- colorants
- pure water
The recipe is simple: it is necessary to mix the composition in equal proportions of stone chips and slaked lime, then add a little soap and mix well. Add dyes at the end. You must select the desired color of the Venetian, this stage is called tinting. Tinting of Venetian plaster is an important stage of preparation. The cosiness of the apartment or house and the state of mind of the owner will depend on the future color. The stores will provide you with a huge range of all kinds of colors and shades of colors. And it is important to know that when dried, the color becomes lighter by a tone, and sometimes by two tones.
It should be remembered that when preparing the Venetian, the temperature in the room should be above 10 degrees Celsius. You can also buy ready-made plaster to facilitate your task. After all, it is worth remembering that in the manufacture of plaster it is necessary to clearly know the ratio of materials, and to paint only in a clear and correct proportion, since the shade of the surface in the future will probably be different.
DIY Venetian stucco (video)
Wax helps to paint the plaster in the right color when using dyes. It can also be used to repaint the same surface. It helps with the restoration. The consumption of the Venetian depends on the area and the number of layers to be applied. The average consumption is 0.5 kg of material per 1 square meter of surface.
Necessary tools
Materials and tools for the preparation and application of the Venetian:
- finished plaster
- water emulsion
- wax
- putty
- primer
- dye
- mixer drill
- Venetian trowel
- narrow spatula
- japanese spatula
- different types of trowels for decoration
- ironer
- abrasive sponges and rags
- large and small sandpaper
- mixing tanks
Surface preparation and application
Next, you need to prepare the surface on which the Venetian will be applied:
- We plaster or clean the walls (or ceiling) of wallpaper, paint, etc.
- In the presence of cracks, holes, potholes, they must be repaired with putty
- We clean the walls of roughness and ledges
- We process the surface first with a start putty, let it dry and then putty the finish.
- Next we process the walls with large sandpaper
- The last stage of preparation is the application of a primer on the surface. After drying (3-4 hours), the procedure must be repeated. Sometimes a third layer is applied, applied to the tone of the future Venetian.
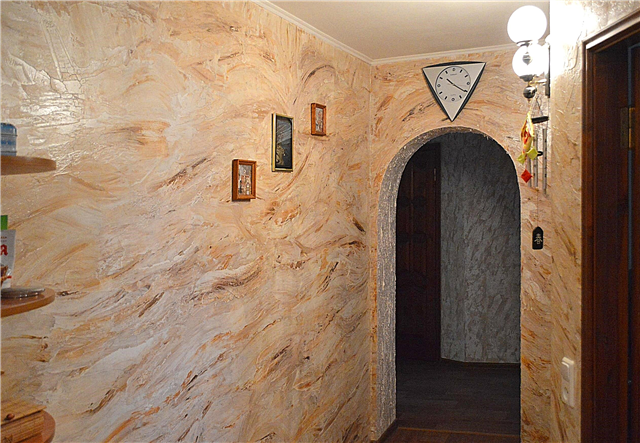 Venetian stucco in the hallway
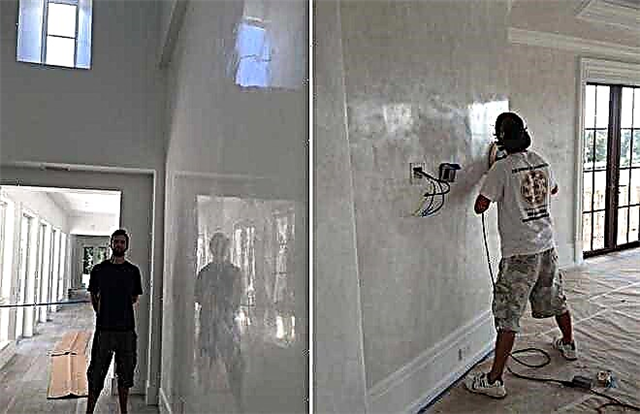
It is important to know that working with this material is a laborious and painstaking process. The best craftsman spends 5-6 times more time than finishing with ordinary plaster. Therefore, in order to get the hang of applying it, it is recommended that you first practice on the panels or in individual sections of the walls. Basic rules and technology for applying the Venetian:
- The first layer must cover the entire surface area. The layer should be thin
- Next, the layers are applied with spatulas or a trowel in an arc, to form the desired pattern (the number of layers on average is from 4 to 12, depending on the desired texture)
- Put layers with small interruptions, the plaster managed to dry.
- Each subsequent tone should differ from the previous tone in order to create the necessary pattern and perspective. You can also put different (contrast) colors. The spatula must be wiped well after each smear.
- Next, a thin layer of wax should be applied to the walls to give it water resistance and create a matte or glossy surface. And after the wax has completely dried, a smooth surface is polished with a soft flannel
Wax dries quickly, within 30-40 minutes. But to touch the surface is strictly prohibited within 6 hours after opening with wax. In order to avoid dents, scratches and marks on the wall. There are several do-it-yourself techniques for applying Venetian plaster:
- Application of classic plaster
- Two-tone plaster application
- Marble plastering
A master class in a video lesson on the technique of applying marble plaster can be seen in the video:
Characteristics of Venetian Plaster
The material did not possess a wide variety for a long time, but recently many combinations with various components and pigments have been used for manufacturing. You can perform any pattern, choose the desired color, texture. When mixing synthetic impurities, you can get a durable composition that is radically different from other finishing materials. You can use dust from mineral and rock. Most often they use marble, granite, quartz, and natural stones of different colors.
The finer the dust, the better the plaster.
The composition necessarily uses stone chips, a binder component and a dye. For bonding, hydrated lime was used before, and only natural materials — juice of berries and plants — were used as dyes. All this was mixed to make a mixture in the form of a cream. When the mixture was prepared, it could be used for application. All this is easy to do with your own hands, without the involvement of specialists.
The main advantages of plaster:
- Being a universal material, it can be used for decoration of both internal and external walls in rooms.
- It is possible to fulfill any ideas, the main thing is the correct preparation of the mixture.
- An excellent combination with any color in the room, any interior solution. At will, the walls can be made both smooth and rough, embossed.
- The maximum selection of colors, the possibility of applying Venetian plaster in one - or multi-colored form.
- Lack of seams, joints. Due to this property, the surface will look solid, no frills.
In addition to aesthetic appeal and versatility, there are other advantages.The material does not deteriorate under almost any external influences. Compared to any type of paint, putty almost always takes a leading position. The durability is very high, which is suitable when it comes to repairs in a large room, where many people will constantly be. It does not fade in the sun, so there is no need to make awnings to create shade.
The material will not lose its properties for about 40-50 years, if necessary, it is easy to restore the damaged area.
The adhesion to the surface to be trimmed is good due to the addition of special binding material. Cracks will not appear even after a long time, since the material has no shrinkage. In addition to other positive properties, putty is a waterproof mixture. You can lining the pool or bathroom. Given the properties of the components, we can confidently say that the material is one of the best for finishing work.
Rules for applying plaster
The work is divided into several stages. It is important to perform each of them qualitatively, so that at the end of the work there is no need to redo something. Application steps:
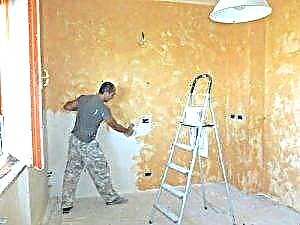
- Surface alignment. First you need to carefully prepare the surface so that the walls or ceiling are ready. Mandatory perfect cleanliness, dryness in the application area. To avoid bevels after work, it is advisable to make the walls smooth. To do this, you can use any plaster.
A standard one made of sand and cement is suitable, but a gypsum-based mixture is the best option. Drying will happen much faster, work much easier. The drying process will not last longer than 2 days, after which you can proceed to the following steps.
- Application of the composition. It is necessary to breed ordinary water. It is worth taking in small portions, making smears on the prepared surface. Every few minutes, you should move away from the wall and see if the drawing is correct. Until the plaster has dried, there is the opportunity to make changes. Everything should look like a single picture, the color should not change. If it is necessary to apply several layers, each of them must dry before applying the second layer.
The first layer is applied completely. It will be the basis for the final image. Use for application preferably a steel or flexible spatula. It usually takes several days to dry.. Do not apply the next coat until the previous one has dried.
- Surface grinding. To perform, you need a mesh. Some use coarse plaster. In order not to violate the integrity of the image, it is worth cutting only the minimum top layer of the resulting composition. The main thing here is not to remove the excess. After grinding, the dust must be removed and the resulting surface primed. If the work is carried out in a room with high humidity, it is advisable to apply synthetic wax on top. It will not allow moisture to enter.
- Carrying out paintwork. After surface preparation has been completed, staining can be carried out. It is advisable to use acrylic paint for this, in order to get every hard-to-reach place, use a brush and a roller.
- Applying tinted paint. You can use several colors or one, but with different saturation. Apply quickly, carefully. Select shades so that they are the same on one layer. Apply paint in small areas of approximately 0.5 m 2. The main thing here is to prevent the previous layer from drying out, applying a new one. On bulges, the paint is partially removed with a simple damp cloth. Do not forget to constantly monitor the quality of work from a distance.
- The last step is to give an additional effect. Many use varnish, others like to create the effect of gilding, bronze, silver. The consumption is minimal, so that they will be able to cover a significant surface. It is necessary to wait for drying, it takes about a week.
Making Venetian Plaster
Venetian stucco with hands is prepared as high quality as acquired. Some people find it easier to purchase a finished composition, prepare it and apply it in a suitable way. Others prefer the hand-made preparation of Venetian plaster. Below are a few recipes.
If the work is planned to be carried out in rooms with a normal level of humidity, finishing the walls and ceiling, a mixture of gypsum and lime in a ratio of 1: 3 is suitable. Add water so that the mixture is not very thick.
You can add additional elements - colors to change the color.
If there is a little humidity in the room, it is suitable in a ratio of 1: 3.5 with the addition of 5% of the total mass of water glass. The last additive can fix the mixture so that the effect of the liquid is not harmful to the plaster.
A dry mixture based on the same components, if the work is planned to be carried out outdoors or in rooms with a high level of humidity, for example, in a bathroom. 1 kg of cement, 1 kg of lime, 2 kg of sand are added. It is necessary to fix with liquid glass, so that the additive is 5% of the total mass. All this is diluted with ordinary water, bringing to the desired consistency.
Other recipes for Venetian plaster
To give great attractiveness, you can add the dust of various stones: granite, marble, quartz and others. For bonding in one piece, lime is suitable or, if you use new solutions in construction, acrylic resin. An element or several thereof is also added to give the necessary color, but this is optional.
It is difficult to find an acrylic resin of the required quality on sale, but it can be replaced by other components that perform the same function. Operational characteristics will slightly deteriorate, but the appearance will turn out no worse than the one on sale.
For preparation, 2 parts of dry gypsum, 6 parts of dry chalk and dry carpentry adhesive are added - 5%. If necessary, add a coloring element.
If you compare a good consistency mixture, it is approximately similar to thick sour cream. Less often, you should not do so that there is no rolling down the walls or ceiling.
Other recipes: 10 kg of putty, fine white sand 10% of the amount of putty and pigment additives are added. A good option: 70% marble sand, 13% marble flour, white cement 7%. The remaining percentage is lime.
Some application tips
The following are some tips to help bring the surface to its desired appearance:
- Training on plywood or fiberboard. Those who wish to finish with Venetian plaster without the involvement of specialists will find it difficult to do everything right the first time. For training, it is worth taking a small piece of suitable material and applying the required layers first there. After everything works out, you can start decorating the walls. The test material should be taken more than a meter to approximately understand how much the mixture is consumed. You can try out different application techniques to choose the most suitable.
- It is unlikely that it will be possible to choose the same color for the secondary batch. It is advisable to prepare the mixture so that it is enough immediately for the entire layer, for the entire territory of the area being trimmed. After a trial application on the training material, it is worth noting the consumption of the composition so that there are no errors in the future.
Even when buying ready-made mixtures, you should not trust the records on the package about the expense. The material of the walls or ceiling, the correct execution of the work, the application technique strongly affect. Moreover, it is worth determining by sampling the composition that is prepared independently. There is a nuance in the selection of colors: do not pour the entire coloring element into the solution. This should be done gradually, achieving a slow color change by mixing. So it turns out to choose the perfect shade for yourself.
- Work best in pairs. So it is much more convenient to apply to the surface, after which the second person with the tools gives the composition the necessary shape. The process of performing work in this area is considered difficult, so one, especially if there is no experience in such events, will be extremely difficult.
- It should be prepared for the fact that the final result on the wall will be noticeable only in the last stages of the work. At first, the desired appearance will not be noticeable. It is not worth planning ahead how it will turn out in the end, because the result is usually different from what you want. Constant monitoring from the distance of the work performed will allow you to understand what and how to do next.
- If we talk about plaster for sale, do not trust advertising delights. Reliable is only the material that was used by friends, subjected to samples.
It’s quite possible to make Venetian plaster by hand without involving specialists, if you put a little effort and spend time analyzing the necessary actions.