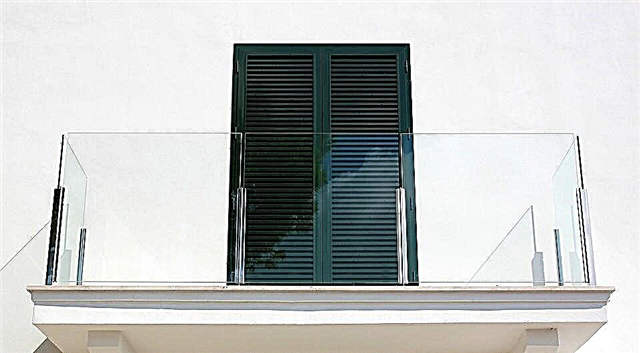
Finishing the balcony is a reason to increase the usable area of the apartment. Even if the space is small, here you can arrange a workshop, a recreation area or a mini gym. In order for the result to please, it is necessary to choose the right finishing materials. Let's talk about what is better to make the floor on the loggia or on the balcony.
Features of the choice of materials for the balcony
Far from construction, people are sure that the loggia and balcony differ only in area. But this is not so. The fundamental difference is that the balcony space is based on a plate adjacent to the wall with only one side. That is, it is in limbo. Whereas the loggia rests on supporting structures at once by three sides. This fact determines the features in the choice of their design.
The floor options on the loggia are chosen without much fear of overloading the structure. They will always withstand the minimum screed height. Whereas for a balcony, a concrete screed, especially hiding significant elevation changes, is almost always contraindicated. Even a new stove is unlikely to stand it; calculations and consultations with specialists are needed.
The old base will almost certainly not cope with the excessive load. In some cases, it is possible to correct the situation using a metal reinforcing system. To find a solution for each case and correctly calculate it can only engineers and architects with experience in such calculations.
Much depends on how you plan to design a balcony space. If it is glazed and insulated, alignment with a dry screed or lag system is possible. An open area is most often not perfectly leveled. The plate is restored with a special solution, cracks and other defects are removed. The top trim is laid on top.
Finishing materials are selected based on what kind of balcony the owner sees. Open and glazed spaces require different solutions. We will analyze the possible options.
What material is best for flooring on an open balcony
The finish is fully exposed to a bunch of adverse weather conditions. Therefore, the material must be resistant to temperature extremes, tolerate frost and heat well, not collapse under the influence of moisture, withstand UV radiation.
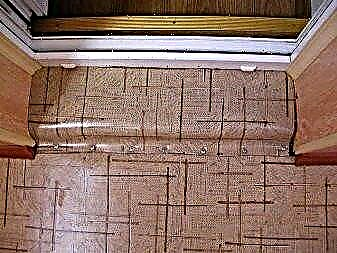
Properly prepared and ground. All potholes, chips and cracks are well repaired by the repair compound. A waterproofing is laid on a foundation prepared in this way. It prevents moisture from entering the concrete slab, and keeps it from breaking. Choose any suitable insulation: coating, roll, etc. Next, fit one of the finishes.
1. Ceramic tile
Many varieties of cladding are available. For an open area, low-porous ceramics are chosen: clinker, metlakh, porcelain, cotto, etc. Porous plates, even coated with glaze, absorb moisture too actively. When freezing, it will destroy the tile. For the floor, only rough models are selected that exclude slipping.
Preliminary work
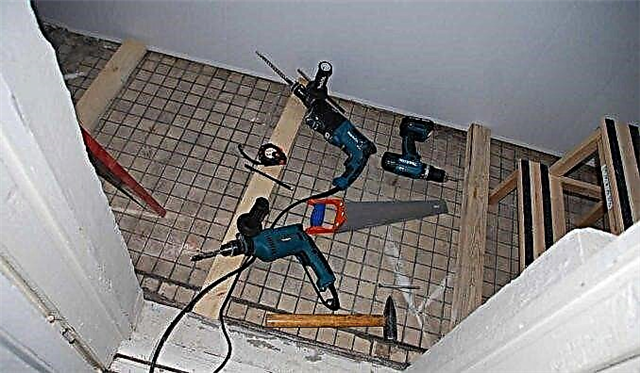
Before considering options for flooring, you need to prepare the floor for decoration. This procedure involves the following steps:
- We remove the old screed, paint, linoleum, tiles, as well as excess items from the loggia.
- We eliminate the centers of dampness or decay.
- We plug in the cracks through which rain and snow seep.
- Spray with a construction preparation against fungi.

How to raise the floor?
If you need to raise the floor level on the loggia with your own hands, you can use several methods, the choice is made depending on the height of the difference:

- if necessary, raise the floor to a height of not more than 60 mm, as a rule, a cement screed is performed,
- if the height of the difference is more than 60 mm, then you can either lay a hard insulation (polystyrene) on the floor and make a cement screed on top, or make a rough floor from plywood, laying the sheets on the logs.
To make a rough floor from plywood, you first need to prepare the base - to repair the defects and align. Then you can start laying logs that can be made from boards.

As a rule, it is recommended to lay logs around the perimeter first, creating a box. Then the logs are laid across the room, the spacing of the elements is 40-50 cm. The height of the log is determined depending on what level you need to raise the floor.
There are many ways to fix the logs to the concrete base. If the work is done with your own hands, then, most often, they use fastening with the help of bosses. So called paired fasteners, which are laid on both sides of the logs with a certain step.
The lugs themselves are mounted on the balcony slab using dowels, and the lags are screwed to the lugs with screws. The design is very reliable and durable. If you plan to make the floor from the board, then the material is laid directly on the logs.
But if there are plans to trim the floor with other material, you first need to make a rough floor of moisture-proof plywood. For work, sheets of plywood from a thickness of 8 mm should be used. Sheets are cut into strips or squares and stacked on top of the lag "into a run", that is, so that the joints do not coincide. Fasten sheets of plywood to self-tapping screws or to glue such as "liquid nails".
To subsequently avoid deformations of the floor, it is necessary to leave a gap between the walls and the rough floor of plywood around the perimeter of the room. The width of the gap is 2-3 cm. But there should not be any gaps between the sheets of plywood, they must be laid tightly. Having completed the installation of the rough floor, it will be possible to finish it with the selected material.
If the room is open
If it is not planned to carry out glazing and warming of the loggia, then you need to choose materials that can withstand outdoor conditions. The material by which the floors will be laid should have the following qualities:
- be moisture resistant
- do not collapse when temperature changes,
- be mechanically stable.
The following material options meet these requirements:
- Porcelain tile. This is almost ideal for open loggias, as it is perfect for outdoor use.
- Floor ceramic tiles. This flooring is less resistant to mechanical stress, however, it fully meets the requirements.
- Cement strainer. If it is not planned to glaze the loggia, then you can leave the floor without finishing, that is, just with a cement screed.
Advice! When choosing the material with which the floor should be cladded, it is better to give preference to coating options with a rough surface, so as not to slip in the cold.
If the room will be insulated
In the event that it is planned to perform glazing on the loggia and to warm the structures well, it will be possible to finish the surface of the floor with a variety of materials, you can use the above options - porcelain tiles and ceramic floor tiles, and other materials.
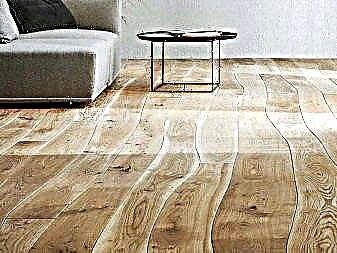
Boards
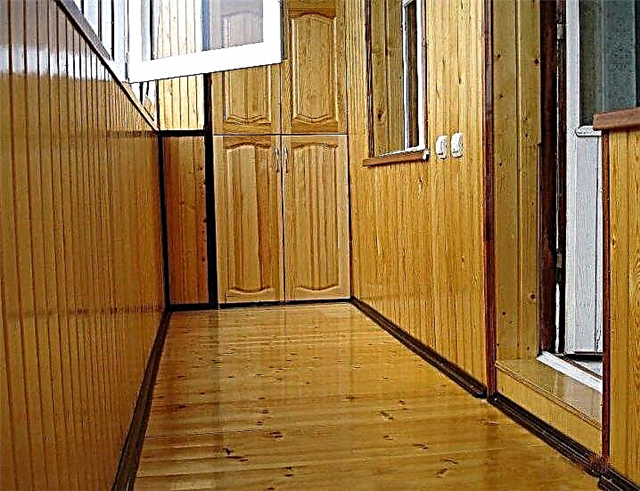
A classic of the genre is a wooden floor. The technology of laying the floor from the boards is developed to the smallest detail, so the work can be done by yourself. Many people decide to make a wooden floor, since it is an environmentally friendly material that creates a healthy indoor microclimate.
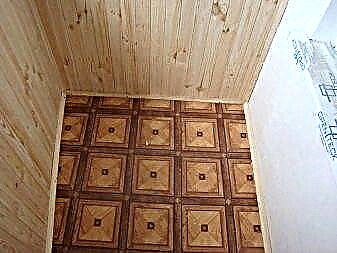
Advice! A wooden floor will look especially successful if the walls of the loggia are sheathed with a wooden lining.
If a complete warming of the loggia is performed, then the wooden floor must also be insulated. The insulation material is placed in the gaps of the crate, which form the logs. For insulation, foam or mineral wool is usually used. The floor covering itself is created from a grooved board, it needs to be tightly adjusted to each other so that the coating does not have gaps.

The only drawback of wood is its lack of resistance to moisture and biological hazard (molds, etc.). Therefore, in order for the wooden floor to serve for a long time, the boards are covered with paints and varnishes.
Advantages and disadvantages of a wooden floor on the balcony
Wood is a natural material traditionally used in flooring. Its main advantage is its low thermal conductivity. Due to this property of wood, wooden floors are very warm and settle down where it is not possible to heat the surface in another way, for example, with a “warm floor” system.
Other advantages of wooden floors:
- Aesthetics - combined with almost any interior,
- Wood is easy to process (cut, fastening),
- Environmental friendliness is a completely natural material,
- Strength. Some types of wood, such as beech, oak, larch, can last for several decades without changing the texture.
Wood also has many drawbacks. For example, it is flammable, rotten, and woodworms damage it. These disadvantages are minimized by the use of special compounds: flame retardants and antiseptics. Another significant minus of wood is its natural ability to absorb moisture. You can completely get rid of this drawback by covering the floor with varnish or painting it. A protective layer of paint or varnish will also reduce the degree of abrasion of the floor.
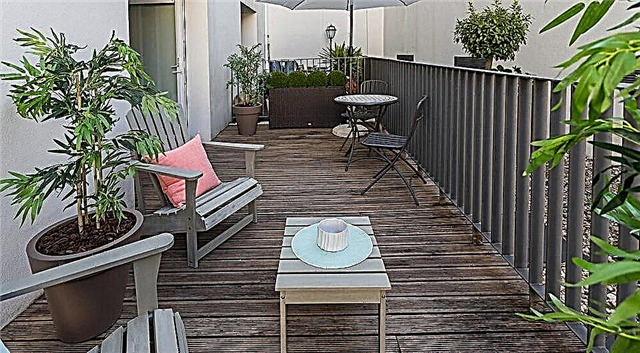
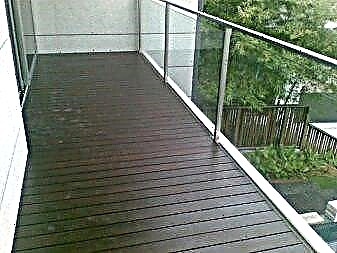
On an open balcony or loggia
An open balcony or loggia is practically not protected from the effects of natural elements. This introduces certain restrictions on the choice of materials and technologies for repair. Actually, there is no choice. Level, if necessary, only with a screed. There are only options for what this screed should / can be done.
- Concrete with aggregate of fine gravel - with a layer thickness of 4 cm to 5-6 cm.
- With a pouring thickness of 3 to 4 cm, it is more rational to use a DSP.
- With a layer thickness of less than 3 cm, self-leveling mixtures (bulk floor) are used. Select the thickness of the layer and do not forget that the mixture should be for outdoor use.
 Raise the floor on an open balcony or loggia, you can only use the screed
Surely there are some other technologies. There are many materials today and new ones appear regularly. The most popular and tried are listed above.
Finishing and decoration materials
On the open balcony, the screed can immediately be smoothed with cement immediately after pouring. This will give an even, dense surface (concrete is said to be iron), through which water seeps poorly. But more often ceramic tiles or porcelain tiles are laid on top of the screed. Tiles are better without glaze so that it is not so slippery.
 To get a warm, non-slip coating, you can use rubber crumb or tile
In general, the method of repairing the floor on an open balcony or loggia depends on what kind of coverage you plan, what requirements you make and whether or not to raise the floor. If you just don’t like the concrete floor or tile, you can apply rubber crumb over the screed (if you do not need to raise the floor, then the screed is not needed). If you want it to be non-slippery under your feet, you can stick rubber tiles on concrete, lay plank (very similar to a terrace board, but made from synthetic material). You can even knock down wooden shields by treating the boards with protective antibacterial impregnations. Ten years is enough with a guarantee.
How to insulate the floor on the balcony
No matter how attractive the open balcony or loggia, still, we prefer to glaze it. In this case, you can use it not only in the warm season. On a closed balcony, the approach to flooring is slightly different. First of all, it is worth deciding whether or not you need insulation of the balcony floor. If you want the temperature to be higher in winter than overboard, and your glazing is tight and the walls are insulated, then it makes sense to insulate the floor. Another option when floor insulation does not hurt is when you have an open balcony or nothing at all. Then, to create more or less comfortable conditions, laying a heater is simply necessary.
 It is possible to insulate a balcony floor
Ways, their advantages and disadvantages
There are several ways to warm the floor on the balcony:
- put insulation under the concrete screed,
- lay the insulation between the lag, and lay boards or plywood on top,
- we put high density polystyrene foam on the plate, and there are already logs on it, to which we fasten the coating.
 This is the third option - working, but "wrong"
Both the screed and the logs simultaneously level and raise the floor level. But the technologies are different, as are the materials that are used. The terms of “commissioning”, by the way, also differ significantly. Sex on the lags can be done in one day, but the screed will "ripen" a month. But with a screed there are no creaks, and the floor on the lags can be with "musical accompaniment." In general, there are pros and cons here and there.
The third option is a folk invention. The technology is not respected, but the circuit is operational under one condition. The insulation must withstand the planned load. If you use EPSP, there will be no problems - he holds a concrete screed. All other materials are in question, as they are not intended for long-term resistance to static load.
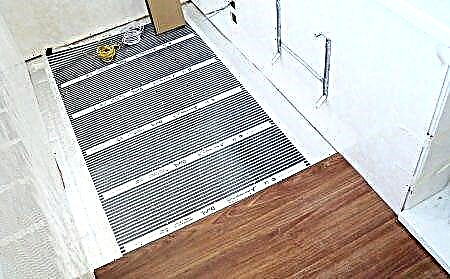
Heated floor on the balcony
Another moment. If you want to make a heated floor on the balcony, it is better to choose a screed. Yes, longer, but more efficient in operation. Although, if you use infrared film, it can be laid on plywood and on boards. It is only necessary to lay a heat-insulating layer under the film. This layer is needed even if there is thermal insulation under the deck. But the minus of this solution is that heating film floors are less reliable than cable floors. So a screed with a heating cable laid in it is more preferable.
 You can make a warm floor using an infrared film (faster) or a heating cable (more reliable)
Why not do floor heating on the balcony from heating? Firstly, it is prohibited by law, as the circulation of the entire riser is disrupted. But there is a second. The mass of the warm water floor is significant and not every stove can stand it. If you have individual heating and theoretically you can make heating from heating, you need to calculate the load and compare with the bearing capacity. And only if your balcony can withstand the expected load, you can begin work.
Which insulation to use
In general, there are a lot of materials for floor insulation, but most often they use only three types: mineral wool (stone or glass), polystyrene and extruded polystyrene foam. All materials are imperfect, but if you know their flaws, you can neutralize them.
- Extruded Expanded Polystyrene (EPS) - the most effective (keeps heat better). It can also be put in the screed, as it does not crumple even under considerable weight. You can lay it on the floor on the logs - between the supports. The disadvantage of this material is its high price. This is perhaps the only negative. Small volumes are needed for a balcony, so if it is possible, it is best to insulate the floor under the screed with this material.
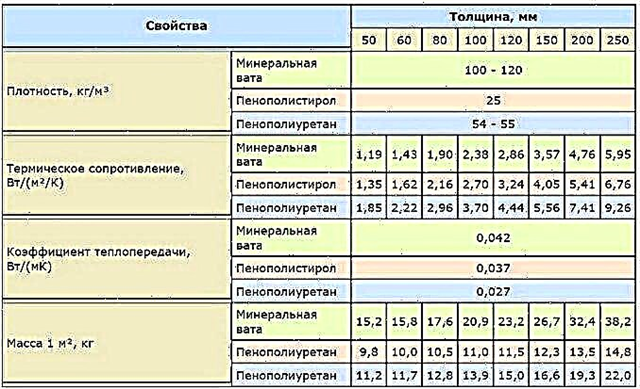 Table of characteristics of heaters
There is also such insulation as foamed glass. It is generally almost perfect. This is a completely natural material. It has excellent characteristics, does not crumple, does not absorb water and is not afraid of getting wet. It is sold in the form of “bricks” and “blocks” of a certain format or in the form of chips. The only drawback of this material is the price. True, pruning and crumb are cheaper, but they require more. So the relative savings.
The floor on the balcony lags
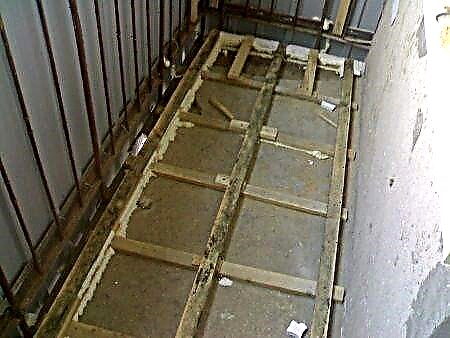
The most popular way to repair the floor on the balcony and loggia is the floor on the logs. As a lag, usually a wooden bar is used. Insulation - mineral wool or polystyrene foam. They put plywood on logs more and more often. You can and boards, but there is no need. Unless you want to sand the board and varnish. If linoleum is planned on the balcony, even tiles, you can put plywood. The plywood thickness for flooring on the balcony is 16-18 mm. In extreme cases, you can take 14 mm, but not thinner - it will bend.
 To repair the floor on the balcony with your own hands is real. One option is lagging
The height of the lag and the thickness of the insulation
The height of the lag is calculated either based on the thickness of the insulation, or from the height by which it is necessary to raise the floor level. When deciding on this height, do not forget that the floor level on the balcony should be at least slightly (1 cm) below the floor level in the room. This is in case of a flood.
Before you make the floor on the balcony, do not be too lazy to draw a size plan and make a drawing of the future design. This will save time and money, and you will better understand what you need and how to do it all. You can draw on a sheet in a cage, you can in any of the programs. Dimensions do not put "from the bulldozer", but according to the measurement results. Both width and length are best measured at two or three points. The difference can be quite substantial.
 You can raise the floor level on the balcony to any height with lags and flooring made of plywood or boards
So, what thickness do you need insulation? If it is mineral wool, then for the middle strip of Russia the “average” thickness is 100-120 mm. If this is an EPSP with a density of at least 85 kg / m3, then a thickness of 3-5 cm is enough. Polyfoam need 7-9 cm. Depending on the thickness of the insulation, choose a beam. It should be slightly higher than the level of insulation - by 2-3 cm. Total:
- if mineral wool is 10 cm thick, then the beam should be 120 * 50 mm,
- for EPSP 70 * 50 mm is enough,
- for foam - 100 * 50 mm.
This height makes the transverse jumpers. They are connected by three longitudinal bars. The thickness of this beam can be small - you can put a board 28-32 mm thick. We count the amount of timber according to plan. That's why he needs it so that you can take just as much material as you need.
Since on the balcony a beam for the crate is usually needed about a meter long, there is no need to buy a standard three or six-meter beam. On any sawmill there is a non-standard smaller in length. It costs much cheaper and this is a real chance to save. Decide on the length of your crossbars and look in the grading. But not due to the quality of the wood, but due to the length.
The width of the insulation is chosen so that it does not have to be cut, or so that the waste is minimal. At the same time, note that if the distance between the planks is 58 cm, mineral wool should be at least 60 cm. It is crushed. And thermal insulation is better if there are no gaps. Therefore, at the installation stage, it must be difficult to refuel, crushing a little. Otherwise, there will be gaps along the lag. And insulation with cracks is the lack of insulation.
If you put polystyrene or EPS, then cut it according to the size of the cell. In this case, the gaps will be all the same. They are filled with polyurethane foam. She is also a good insulation. And so as not to foam too much, take foam with a small coefficient of expansion. After excess polymerization / hardening, cut off with a knife.
How to level the floor on the balcony with lags
Even in our rooms, the floor has significant differences. On the balcony, the situation is usually not better. If you want to have a flat floor, you must first find the highest point, and then set a beam on it.
This is easiest to do if there is an electronic level. Expand the horizontal plane, raise the device so that the beam is at a height at which the beam should be aligned. Then you can transfer the line to the walls - just outline with a pencil. You can leave the device on and navigate along the beam.
 Raise the level of the floor, level it and at the same time do not overload the stove, you can floor on the logs
If there is no level, you can take a water level. At a certain height, set the starting point. Say, to the right of the door, at a height of 50 cm. Using the water level, transfer this point as an example - in increments of 1.5-2 meters. Connecting all the points we get a horizontal line. Now you can measure the distance from this line to the balcony slab. Where the distance is greater, the lowest point will be. You will be guided by it, exposing lags.
The technology of manufacturing the floor on the logs on the balcony or loggia
Thin heat-insulating material is usually spread on the stove. There is no particular sense in this, but it will not hurt. In general, this stage can be skipped painlessly. Further, the sequence of actions is as follows:
- Cut the beam into segments of the desired length to lie across the balcony or loggia.
- Place them in increments of 50-60 cm. It is more convenient to select the size of the insulation.
 Raise the floor on the balcony with lag
 From a dry beam we collect a lattice
After the grate has been assembled, it remains to lay the insulation. How to lay it described above. Minvatu is taken aback, polystyrene foam, EPSP - we are foamed with polyurethane foam with a small expansion.
Flooring installation
After the frame is fixed and the insulation is laid, you can lay plywood or lay the board. You can use other sheet materials, for example, OSB. GVL in this case is not very suitable, since when laying directly on the logs, it will sag over time. You can lay it in a second layer, say on the OSB layer.
Whatever material you choose, do not forget that it should not touch the walls - you must leave a gap of about 1 cm. If you need several sheets, we do not join them closely, but with a gap of 3-5 mm. This is all to compensate for thermal and humidity expansion. Slots around the perimeter of the walls will be covered with baseboards, and the seams will be sealed with silicone. Only silicone, choose one that remains flexible after drying. Otherwise, it will simply crack and turn into crumbs.
 The floor on the balcony may be wooden, but it is better to lay plywood under linoleum or tile
Fastens sheet material to the frame using self-tapping screws. The length of the screws is three times the thickness of plywood / OSB or other material. The diameter of the self-tapping screw is 3-4 mm, with a flat head (required) and better - non-red. In red-hot, the hat often falls off under shifting loads. Namely, these occur when increasing or decreasing the size of wood.
Even the best self-tapping screws in plywood or OSB without preliminary drilling of holes are difficult to install. Therefore, we take a drill, which is slightly smaller in diameter than the diameter of the screws. In order not to miss with the length of the hole, you can also put a mark on it. But that is not all. If you put linoleum or laminate, carpet on top, it is necessary that the self-tapping hats are “flush”.
So that the screws do not stick out, we take a large diameter drill and make small indentations above the holes already made. Now you can install the screws. They are screwed into the frame with a pitch of 15 cm. After fixing the flooring, you can lay the selected flooring.
Screed on the balcony
Can be done on the balcony or loggia and concrete floor. With or without heating, with or without insulation - you decide. It will be necessary to fill in a thin layer of less than 3 cm with bulk floors, up to 5 cm use a DSP (a mixture of sand and cement), more than 5 cm it is already possible to put fine aggregate (that is, concrete can be used). The aggregate should be no larger than half the layer. That is, if the concrete layer is 5 cm, the largest aggregate should be less than 25 mm.
 Cementing the floor on the balcony is one way to repair
What brand of concrete / mortar do? Depends on whether it will be heated or not. If you are doing just a concrete floor (with or without insulation), then the M150 or M200 brand is enough. For underfloor heating (heating cable or mats from it), it is better to take a brand of solution not lower than M250. If you put tiles on the floor, then you need to focus on the brand of glue. The difference between the brand of concrete and the brand of glue can not be more than 50. With a larger difference, it is likely that the glue will simply come off the base along with the tile. That is, if you use tiled adhesive with the M350 brand, then concrete can be M300 or M350.
Work sequence
The process of filling the floor on the balcony is no different from the usual. Before starting work, it is necessary to carefully close all the cracks. This is necessary so that moisture does not leak and you do not flood those who are below. And moisture is required to set concrete strength. Further, if necessary, formwork is set. Its edges are best set according to the level - then you can even the solution along them.
Before pouring the solution, if necessary, insulation is laid. If the base is very uneven, it can be leveled with dry sand. Insulation plates are placed on the sand. If it is polystyrene foam, the joints are glued with tape. For the best effect, it is desirable to make two layers of insulation and arrange it so that the seams of the lower layer are overlapped by the top plate. In general, so that the seams of the two layers do not coincide.
 Over the insulation we fix the film
A thick plastic film is spread on top of the insulation. It is sold in two layers, this is how we lay it - we can’t cut it. We bring the edges of the film onto the walls - above the floor level and fix it there. You can use a thin bar and nails, you can use tape. Then we knead the solution in proportions and pour it into the formwork or just onto the balcony. We start from the corner farthest from the entrance, then fill the second side and level the solution. Using a flat board, align using the edges of the formwork as guides. Lastly, fill the center and align it. This is where you have to play out - a difficult moment. It is necessary to get from the threshold to the opposite wall and at the same time align a far from easy solution. To facilitate the process, you can put a brick in the middle, then remove it and smooth the hole.
Screed Care
In general, it is better to curtain the windows before starting to fill. If the balcony is open, in the summer it is advisable to hang at least a net. Local heating leads to cracking, but we do not need them.
After the solution is leveled, we cover it with a film. If the temperature is not higher than + 25 ° C, this is limited. If the temperature is higher for a week after pouring, then wet the screed once or twice a day with water. This should be done not with a stream, but with small drops, and moisten until small puddles appear. After moisturizing, close again with a film.
 Expanded clay is used as a filler. For an open balcony this is not the best choice - the floor will be damp
The film remains until the screed has fully reclaimed - for 28 days at an average daily temperature of + 21 ° C. If the temperature is lower, the period will increase. You can walk on the screed within a few days after pouring, but it is better to continue work after a full set of strength.
Sequence of operations
- Waterproofing. We cover the surface with a special film or cover with waterproof plaster.
- Thermal insulation. Mineral wool, polystyrene foam, polystyrene, that is, any materials with a low coefficient of thermal conductivity, are suitable here.
- Surface alignment. In the presence of small defects it is customary to use a self-leveling mixture. Large flaws can be leveled by means of a screed or by installing logs under a wooden flooring, which are transverse beams made of hard wood. As a rule, the floor level of the living space and the loggia is different, because of this, with the help of the lag, we raise the floor on the loggia to the required level. In addition, if there is a need to raise the floor by 20 cm, this will allow a layer of expanded clay.
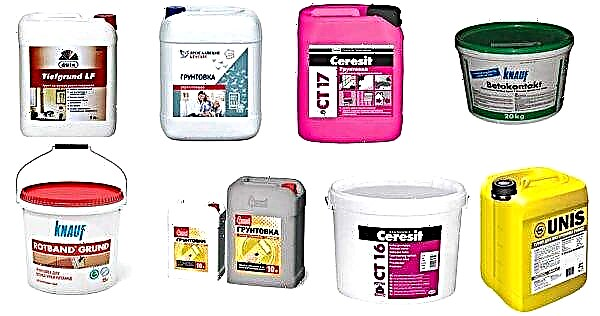
- Primer. This tool increases the strength of the base and contributes to better bonding it to the floor. It is customary to use an alkyd or polystyrene primer for a wooden surface, the concrete base is treated with an epoxy variety, applying it two to three times.

Painting
The most basic technique appropriate for any type of loggia. It is best to buy paint, in which the main component is acrylic, polyurethane or epoxy. This option is characterized by resistance to atmospheric influences. To prevent paint from getting on the walls, use masking tape.

Tree
First of all, we form a frame from the beams that resembles a box and additionally strengthen one beam in the middle of the structure. To ensure a long service life of the floor will help to varnish its surface. The next step is to sew the bars together using self-tapping screws and angles, and after using the dowel nails we attach the frame to the concrete base.Then, perpendicular to the lags, lay the boards and fix them.


If the tree is of poor quality, it should be processed and covered with linoleum. Due to the fact that the tree is light, it can be decorated not only with a loggia, but also with a half loggia.
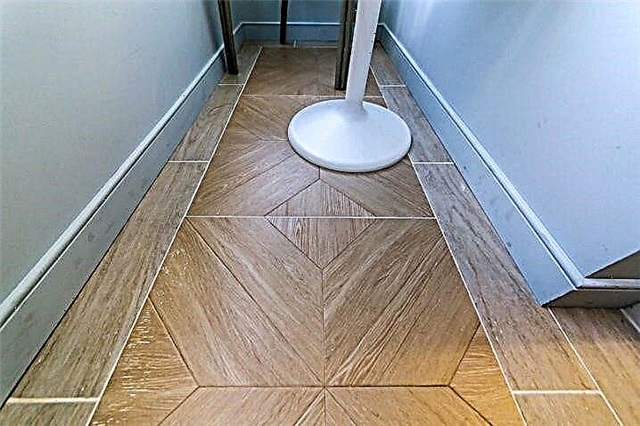
Ceramic tile
To avoid injury, the best option is to lay a tile with a rough surface. To carry out this work, the following materials must be stocked:
- Ceramic tile.
- Building level.
- Tile cutter.
- Solution: cement or adhesive.
- Cruciform lighthouses.


It is better to lay out the tiles from the door or from the corner from which you can see only the whole details of the finish. Using a spatula, distribute the solution on the inside of the subfloor and the back surface of the tile. The distance from one tile to another must be the same, in order to achieve this, we install cross-shaped beacons. We lay tiles on the building level. After finishing the procedure, it is necessary to hide the seams under the putty layer.

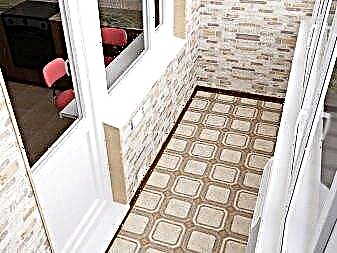
Porcelain Tiles
This type of coating is characterized by durability and strength, resistance to abrasion and scratches, it is not afraid of temperature and humidity changes. In addition, the color palette of the material is very wide, it gives unlimited possibilities to designers.
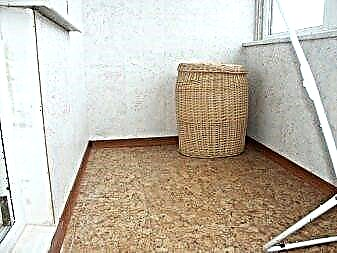
Cork floor
Gained widespread these days. There are several varieties of it:
- Technical traffic jam. Most often, it plays the role of a substrate for a different type of coating, it insulates and insulates. It is produced in rolls or plates, much less often in granules. They can fill holes in the floor or the gaps between the coatings.
- Adhesive. It is a rectangular tile, decorated on top with decorative veneer, which is coated with polymer. Its coloring can be both natural and imitating marble or granite.
- Floating. It has the same structure as the previous version, but differs from it by the installation method: as in a puzzle, the plates are connected with each other with grooves, without glue.

Bulk floor 3D
This is a unique solution, which is a seamless surface of three parts: the base, three-dimensional pattern and the final coating.
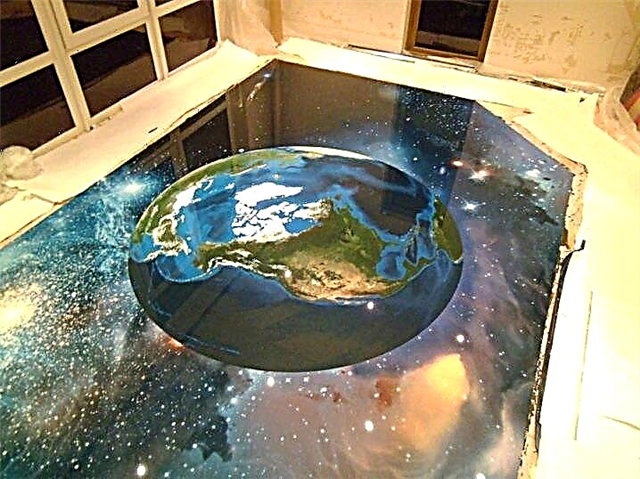
The properties of this floor:
- Not afraid of scratches.
- Resistance to moisture.
- Strength.
- Aesthetics.
- Practicality.
- Durability.
- Just look after him.

This floor is easy to do with your own hands. Initially, it is necessary to fill the floor with a liquid base of a light or neutral color. Then use a roller to paint. After this, apply a second coat of paint, it may be in different colors. And finally, stick on the drawing purchased in the store.

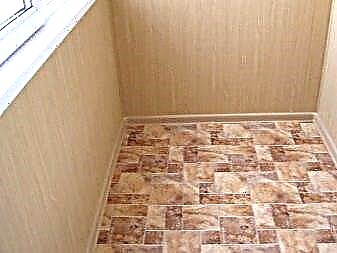
Linoleum
This coating has gained popularity for a very long time, it allows you to make repairs in a short time and save the family budget. The characteristics of such a material include
- Reliability.:
- Softness.
- Strength.
- Practicality.
- Moisture resistance.
- He is warm.
However, it is worth remembering that linoleum is vulnerable to mechanical stress (for example, the pressure of heavy objects) and is deformed if it is laid on an uneven surface. To put linoleum on your own, you need several tools:

First, unfold the material and flatten it carefully. Carrying out installation, the coating should be leveled in order to avoid defects and tubercles. Fix linoleum on the surface using ordinary or liquid nails. After completing the process, the coating must be fixed with a skirting board of a suitable color.

Laminate
It is a widespread, environmentally friendly material at an affordable price. In appearance it resembles parquet and has a number of useful properties:
- Serves for many years.
- Strength.
- Practicality.
- Easy to install.
- Nice appearance.

On the eve of laying, the coating, as usual, is allowed to lie in a warm room for about two days.


For installation, you need a number of tools:

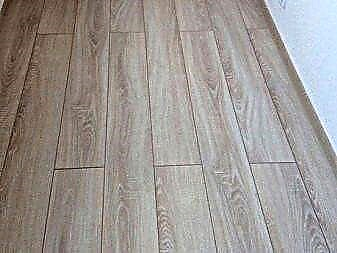
It is customary to lay the laminate only on a perfectly flat surface. Lock the wedges against the wall and threshold. Begin the procedure from the side that is opposite the door. Installation can be done diagonally, along or across. For greater reliability, shift each new row by at least forty centimeters.
Between the material and the wall, it is necessary to provide a place for the baseboard, this distance should be equal to about ten millimeters. Next, it is necessary to connect the laminate plates together using the locks that each coating element is equipped with.

There are three types of locks:
- Connection method "constructor". They lift the finished row of laminate and attach another detail to it. The obtained strip plates are fastened together.
- Connection method "tamping". Elements are fixed in length, after which they need to be lined in order to connect in width.
- Connection by means of a plastic insert, it fastens the plate in width.


Parquet
Appeared before a laminate and has similar technical properties. This coating must certainly have a protective layer (paint or varnish). Installation of the parquet floor should be carried out at a temperature of at least 18 degrees. On the eve of the process, the coating must be unpacked and left to lie down for a long time, at least a week.
Parquet can be laid in several ways:
- Floating. Parquet boards are fixed at the connection, special ridges and grooves are cut out, this technique does not involve the use of glue.
- Bonding to the base. Here, plywood flooring is mandatory, laying is done with glue and a spatula. It is worth carefully considering the choice of glue, it should contain less than fifty percent of the water. At the end of the installation, a technical break of 5-7 days should be taken.
- Laying to the wooden floor with nails.


Sheets of plywood are attached with screws to the base. It is very important to leave a distance of about 1.2 centimeters between the parquet and the wall, treating it with sealant or polyurethane foam.

Carpet
Nowadays, you can buy this coating with a pile of any quality, color and length. For a floor on a glazed warm loggia, the best option would be a carpet made of artificial materials, laid on linoleum, parquet or a wooden floor. To work, you will need a roller and a special knife, which in appearance resembles a sewing machine. There are five tricks for laying carpet, but for the floor on the loggia it is best to limit yourself to two of them:
- Free styling. The most elementary method, according to which the carpet is simply laid on the floor like a palace or carpet, after which, using scissors, they make a notch in the form of a letter V at a 90-degree angle, then cut it around the perimeter.
- Stretch method. This method is carried out by means of narrow strips - gripers, from which thorns stick out at an angle of 45 degrees. On both sides of the edge of the tip directed opposite. For installation, they buy a “fluffy” carpet and fluffers are selected for it.
Preparation of the base for the flooring of the wooden floor
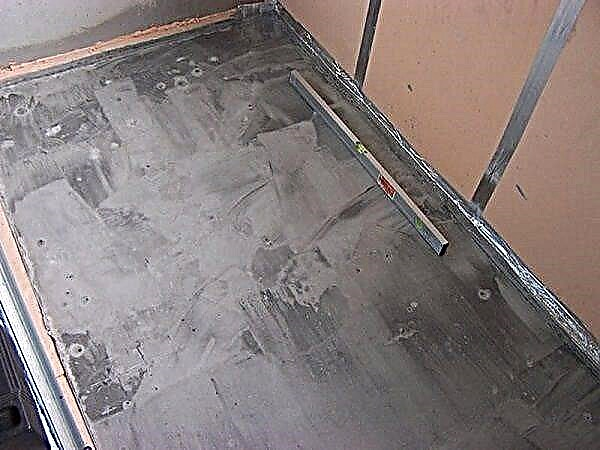
Although the balcony slab will be covered with wooden flooring, it must be put in order. If the cement screed cracked and barely rests on the base, it should be completely dismantled and a new one filled. The stove is freed from the old mortar and thoroughly cleaned. Next, waterproofing and filling the screed.
How to make a cement screed on the balcony:
- The joint of the plate with the wall of the house is covered with waterproofing mastic. At the same time, a strip along the wall with a width of about 40 cm is smeared with a waterproof composition and an entry is made to the wall to a height of 10 cm,
- A temporary formwork with a height of about 10 cm is installed around the perimeter of the slab. It will prevent the solution from draining,
- Two parallel slats (beacons) are installed along the length of the balcony slab. They are set horizontally using the building level,

- Cement mortar is poured between the lighthouses and is leveled with an even rail, the ends of which rest on the lighthouses,
- If recesses remain in the screed body, a solution is added to them and leveled again,
- The lighthouses are removed from the screed the next day, when the mortar is still not completely set. The remaining recesses are sealed with a fresh solution,
- With the help of a wide spatula, possible influxes of mortar and tubercles are cleaned from the screed,
- The screed is left to dry completely (1-2 weeks, depending on layer thickness and air humidity).

 New screed
If the floor on the balcony is still strong and does not need major repairs, it is simply cleaned, sealed with a crack solution, other defects are fixed, and immediately proceed to the device of the plank floor.
There are two technologies for installing a wooden floor: on the logs and on the concrete base. The first of them is often used, but under certain conditions, a wood flooring is laid directly on a cement screed.
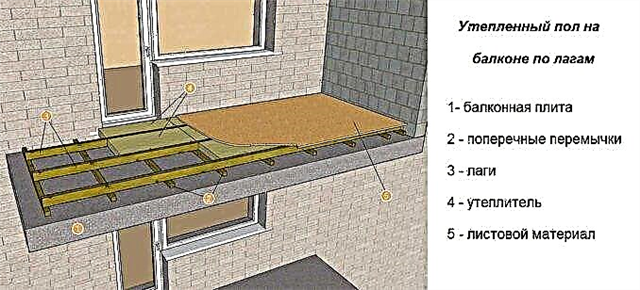
The device of the wooden floor on the logs
If the balcony stove and the floor in the room with access to the balcony are at different horizontal levels, using the balcony is not very convenient, because you have to overcome a high step near the threshold. This is especially inconvenient for young children and the elderly. Having arranged the plank floor on the logs, it is possible to align two surfaces of the floor (in the apartment and on the balcony) in one plane.
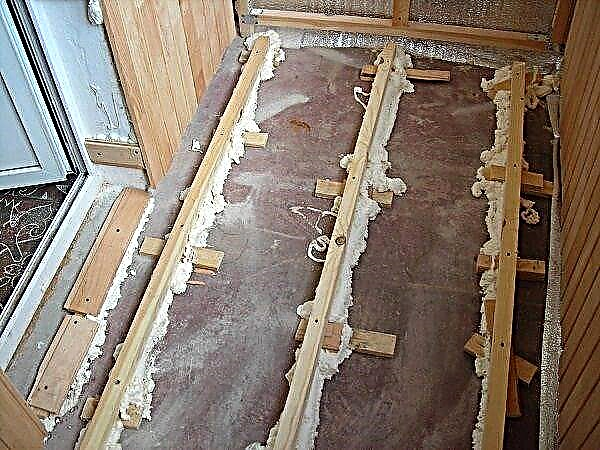
Installation of a log for a floor
For a crate under a wooden floor, an even, well-dried timber is selected. The cross-section of the beam should correspond to the height at which you need to raise the floor, minus the thickness of the floorboard. Further work is performed in the following order:
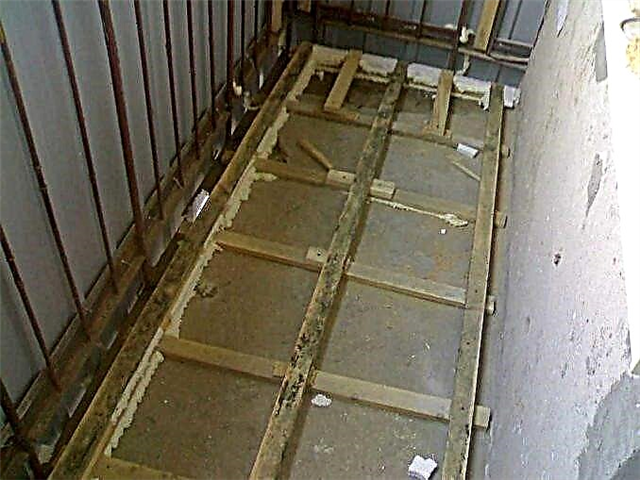
- Along the wall and at the edge of the balcony, two beams are laid parallel to one to one (this is a preliminary preparation that does not require an exact fit),
- The beam is cut into pieces equal to the distance between two parallel bars. The number of segments is calculated so that the crossbars are spaced at least 80 cm apart,
- Sliced workpieces are impregnated with an antiseptic for wood, and after drying, they are treated with drying oil,
- The bars are laid out on a balcony slab and aligned in one horizontal plane using the building level. First, long details are exposed (at the wall of the house and along the edge of the slab), and then side details from the two edges of the balcony. They are fastened together by corners and screws. If necessary, adjust the level, wooden wedges or metal plates are placed under the beam,
- Inside the resulting frame, the remaining transverse bars are mounted, which are also attached to the crate using angles and screws.
The wooden frame can be left as is, or can be fixed to the floor with dowels. It should be noted that in a hard position it will be difficult to dismantle it in order to check the condition of the insulation and dry the internal surfaces.
Great video - how to mount the logs correctly:
Insulation of the floor with lags
Although the wood floor itself is warm, it should be protected from freezing from below, on the side of the concrete slab. Warming will help a lot if the balcony is on the ground floor or the balcony below is not glazed. As insulation, roll materials based on mineral wool or rigid plate are used.
Materials for floor insulation on the balcony:
- Basalt wool
- Glass wool
- Slaggy
- Extruded polystyrene foam,
- Perlite-cement slabs.
The selected insulation is cut into rectangles and fits tightly between the lags. The width and length of the cuts should be 2-3 cm larger than the required size so that the material fits snugly against the bars and does not allow cold air to pass through.
 Penoplex insulation
For floor insulation on logs, you can also use a loose type of insulation: expanded clay, vermiculite, ecowool, granulated polystyrene foam or sawdust. Bulk material is simply poured into the space between the lags and slightly compacted. If after compaction the material sags, it is added more.
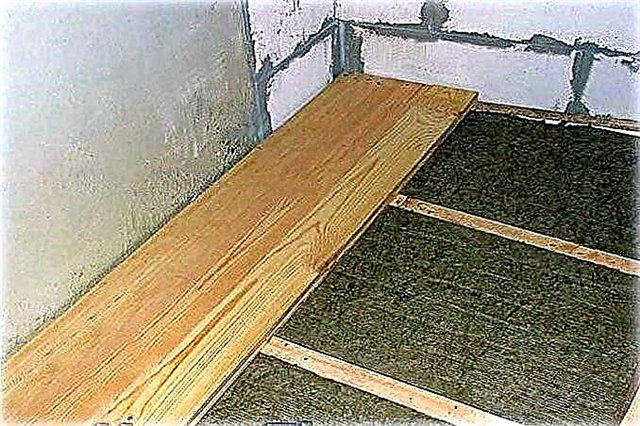
Plank flooring
Flooring - the most acceptable material used as a coating for a wooden floor. It is made with cut-out locks on the edges, so it is easily adjusted during installation. Before laying, the board (just like a bar) is hidden by an antiseptic, and especially carefully processed from the wrong side and from the ends, which will subsequently be unavailable for care.
 Installation of boards using wood screws
Installation of floorboards on the logs:
- The first board is laid with a groove to the wall, departing from it 1 cm,
- The spike of the next board is inserted into the groove of the first, and both elements are pressed tightly against each other, after which their fit is slightly weakened,
- The following boards are laid in the same way,
- The last element is cut to size and mounted in place,
- If the floorboard is assembled in two pieces, the joint should be in the middle of the log,
- All boards are nailed to the logs or screwed with screws. Prefabricated floorboards are also nailed to the lags at the joints. It should be ensured that the caps of the fasteners are drowned in the wood, otherwise they will interfere with the cleaning of the floor, and shoes will catch on them,
- A wooden plinth is mounted around the entire perimeter of the floor, which will close the gap left for the thermal expansion of the wood. Since the room is small, the baseboard is also better to make low.
Finishing board flooring
Wood is a fairly soft material, so it is easy to wear. For the floor to last long enough, it should be varnished or with coloring compounds. Paintwork will reduce the ability of wood to absorb moisture, and this in turn will prevent its swelling and the formation of rot.
 Floor finish
To finish the wooden floor, paint and varnish compositions intended for outdoor use are used. If the boards are well sanded and have a beautiful texture, it is better to cover them with a tinting varnish that deeply penetrates the wood structure. Floor painting is used when not new multi-sized boards are used for flooring. A solid coat of paint will hide the unevenness in the wood texture.
Hardwood floor
Although the floor of the floorboards has many advantages, it does not always fit the design of the balcony. For example, if a balcony is attached to a room or a study is made in it, made in modern styles, linoleum or carpet is more suitable for finishing the floor. In this case, it is better to use solid wood boards for the subfloor flooring: OSB, particleboard, plywood.
 Draft plywood floor
Logs are installed in the same order as for flooring. The only difference is that the step between the transverse bars is 40 cm.The cut boards are laid on logs with a minimum temperature gap (1-2 mm) and nailed (if it is plywood) or screwed with screws (OSB, chipboard). The joints of the plates should fall on the logs, and not hang down from them, otherwise the edges of the plates will bend under mechanical stress. After applying a protective layer of drying oil, flooring is laid on the floor from wood boards.
Wooden floor with screed
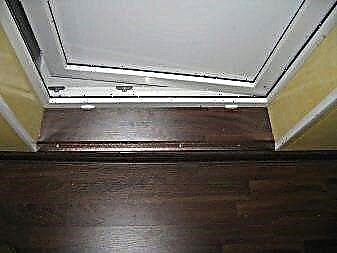
A wooden floor is laid on a cement base when the balcony slab is almost flush with the threshold. In such a situation, the installation of the lag will raise the floor above the threshold, which is unacceptable from a technical point of view. There are two options to lay a board in such a situation. In the first case, grooves are cut out in the screed, a beam is inserted into them, and then the floorboard is mounted. Apply this method only when the height of the screed allows you to make recesses of sufficient depth. The laying principle is no different from the installation of boards on the logs, the only difference is that between the cement base and the wooden floor the distance is only 1-2 cm.
The second method is as follows:
- Cement screed is coated with waterproofing,
- Plywood sheets are laid directly on the waterproofing, which are fastened to concrete with dowels,
- A massive board is laid on a plywood base,
- A thermal gap of 8 mm is left between the first board and the wall,
- The board is attached to the base with self-tapping screws in 25 cm increments,
- To prevent cracking during drilling, holes should be made in advance,
- Fasteners are recessed into the wood by 5-8 mm, and the resulting recesses are closed with a wooden dowel,
- The board can be put on two-component glue, but at the same time it is still additionally fixed with air studs,
- The floor is polished and tinted with varnish.
A short video on installing flooring without insulation: